iTunes U @ SJSU users guide
Overview
This guide is for faculty and staff who are participating in the iTunes U @ SJSU pilot program.
If you are not currently participating, but would like to participate next semester you can apply by sending an email to Mary Fran Breiling,project manager for the iTunes U project.
To use iTunes U, you will need to do the following steps
This guide will explain how to do each of these steps. Since the content you will be posting as part of the pilot program will be publicly accessible, it would be a good idea to also download and read the CSU suggestions for copyright protection.
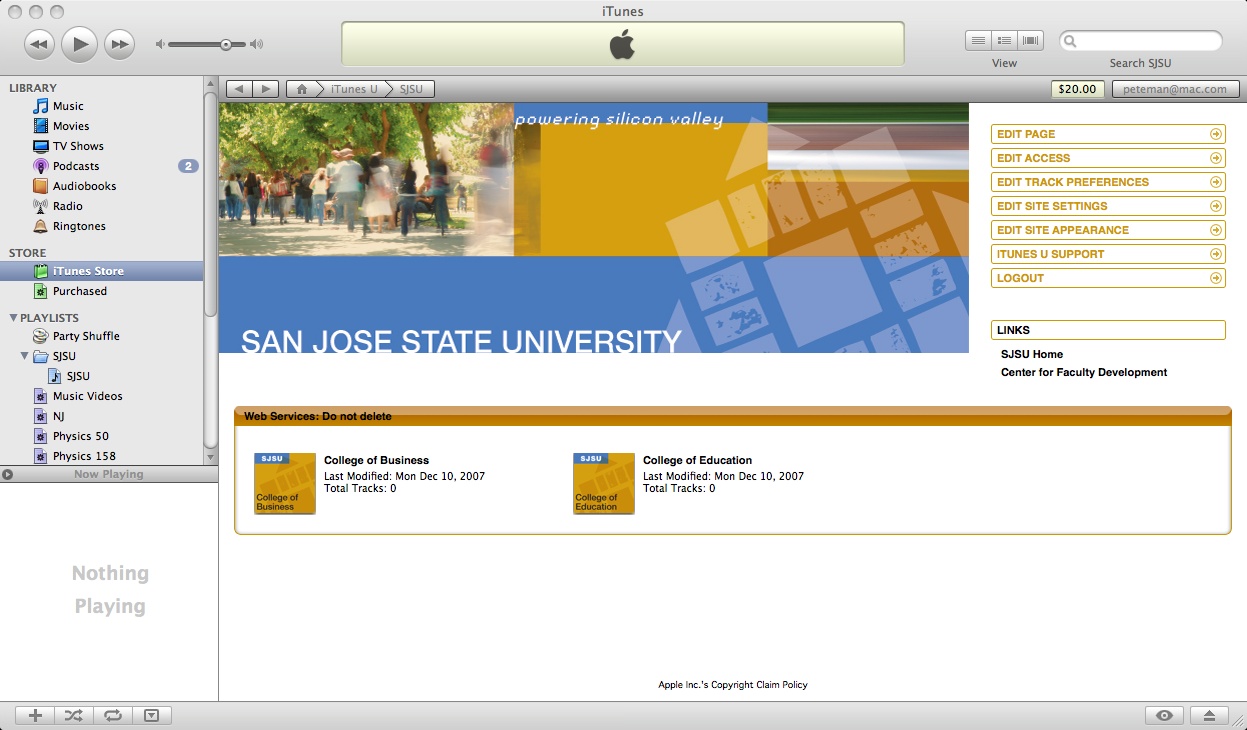
To access your iTunes U page, go to https://www.sjsu.edu/signin/itunesu/login. You will need to login with your SJSUone account. This is the same account you use to log onto the wireless network. Your university ID is your username. Once you are authenticated the iTunes application will open to iTunes U @ SJSU showing all of the pages that you control (for example if you are an instructor teaching two classes with iTunes U you will have a page for each class). Click on the page that you wish to edit.
Once you have opened your course page you will see a basic template with various elements that can be edited or replaced.
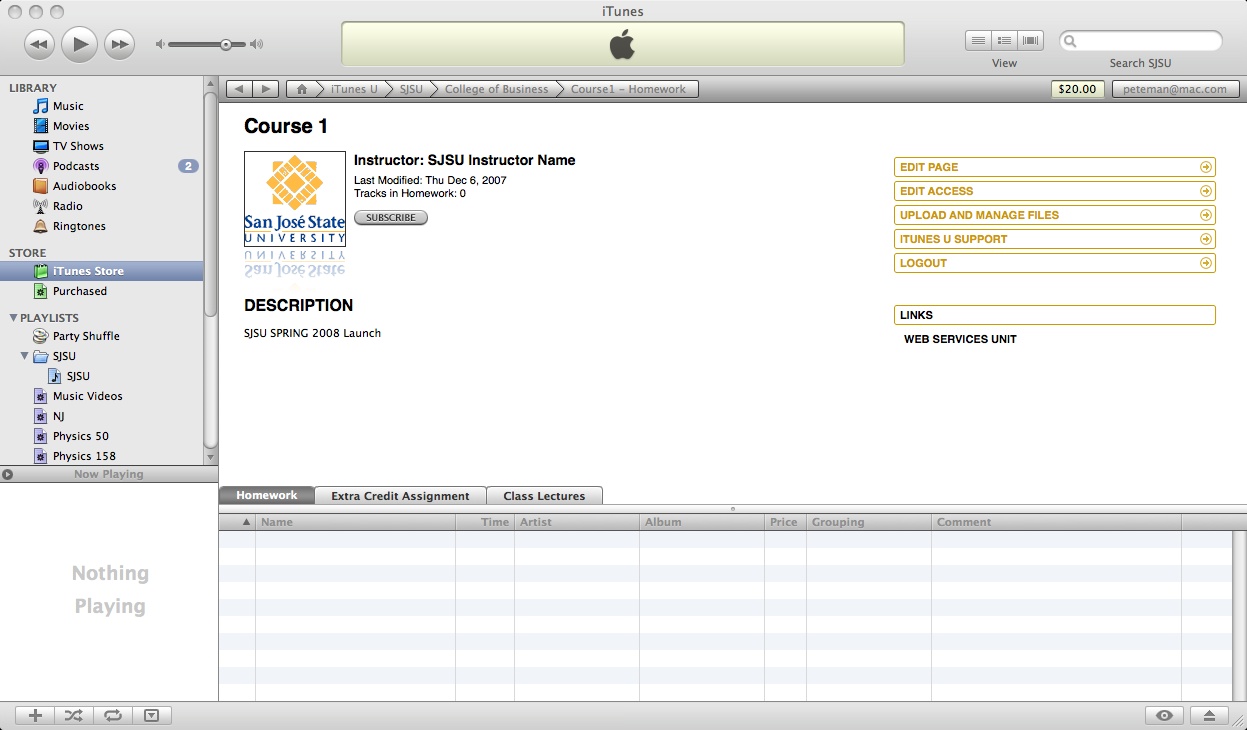 Click the "edit page" button on the right side of the page to edit these elements. A small "edit" icon
  will appear next to any element that can be changed. An "upload" icon will appear next to any element that can be changed. An "upload" icon  will appear over any image that can be replaced by uploading a different image. will appear over any image that can be replaced by uploading a different image.
Uploading a logo
To upload a new logo for your page, click the "upload" icon that is displayed over the default logo. Your web browser will open up with an "upload dialog"
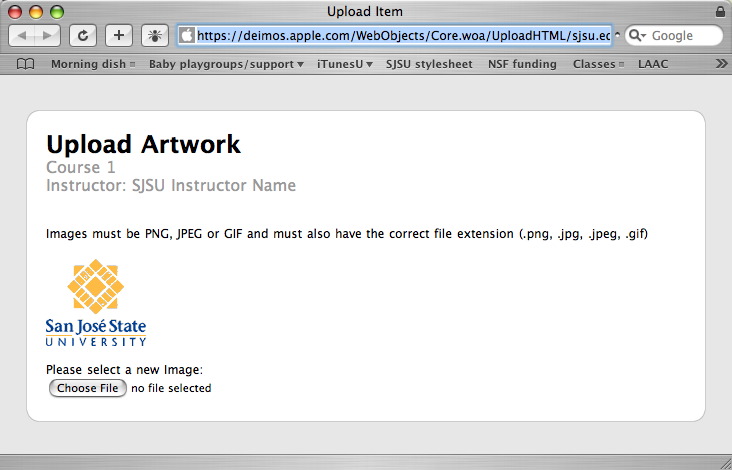 Select "choose file" and navigate to the image file on your hard drive that you wish to use as the class logo. It must be in PNG, JPEG or GIF format. You can now go back to iTunes to continue editing your page. Your image file will upload in the background, when it is complete the logo on your page will change to reflect the new image.
Editing page information
To edit your page information, such as the instructor name and class description, click the "edit" icon next to the placeholder text. The text will turn into a text entry field allowing you to replace it with more appropriate text.
Adding links
The "links" area on the right sidebar of your page is designed to have a list of links to web pages or to content within iTunes U. You can change the name of the links section by clicking on the edit icon for the "links" header, and you can add new links by selecting the "+" icon that shows up in the list of links. This will spawn a new link dialog

Replace "New Link" with the clickable text you want displayed for your link. Below in the URL field enter the URL for the content you wish to link to. You can move the link up or down in your list of links by clicking  in the top right of the new link dialog box. You can cancel by selecting in the top right of the new link dialog box. You can cancel by selecting  , and you can accept your edits by selecting , and you can accept your edits by selecting  . .
If you wish to content within iTunes U, you should first anvigate tot he content you are linking to, right-click the element (control-click on a mac) and select "Copy iTunes Store URL" from the contextual menu that pops up. You can then paste this into the URL field in your link in iTunes U or in your own web page to create a link that will go directly to the content in iTunes U. You should replace the "https://" at the beginning of this url with "itms://" this will allow the link to open directly in iTunes rather than opening a web browser that redirects the user into iTunes.
Managing tabs
While the top portion of the iTunes U page is relatively static the bottom portion contains the links to all of the media files that are distributed through iTunes U. The list of these files are organized into tabs.
A few default tabs are set up for you to use, but you can customize these, delete them or add new tabs as well. To edit a tab click on the tab you wish to change. A tab configuration panel appears
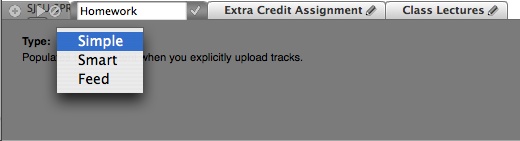
You can edit the name of the tab directly and change its behavior by selecting one of the three options from the pop-up menu. "Simple" is the most straightforward setting, it simply will cause the tab to list whatever content you upload to that tab. "Smart" creates a filtered list of all of the content on your entire page, allowing the tab to show for example all content on your page with the keyword "homework". Finally the "Feed" option allows the tab to display content that is created elsewhere outside of iTunes U and published as an RSS feed (for example an external blog or podcast). Once you have configured the tab click to accept your changes.
You can add, reorder and delete tabs by selecting a tab and then clicking the  , ,  , or respectively in the area to the left of the first tab. , or respectively in the area to the left of the first tab.
iTunes U can be used to post audio, video, enhanced audio (audio with synchronized still images, like a slideshow) or pdf content. Depending on which format you are recording, you will need certain AV equipment:
System Requirements
A mic to speak into. Your computer may have a built in mic that you can use for this. An external mic may give you better sound quality, and if you are not going to be sitting in front of your computer you may consider a stand-alone digital voice recorder or a lavaleir mic with an RF transmitter. For a more detailed description of your options check out this wiki
Recording software. Quicktime pro works well on a mac or PC but costs $30. The free program Audacity is available for mac and PC and Linux and is equally well suited to the task of recording sound to a digital file, provided you also donwload the free LAME plugin for exporting to the mp3 format. If you are recording your audio with a stand-alone digital recorder or you have other mean of generating the compressed digital audio file then you won't need this software.
Note if you want to make a video podcast you'll need a camera. and software to encode it into a format that iPods can read (i.e. h.264 or mpeg-4). Quicktime pro works for this, as does the free open source program Handbrake which is avaiable for the mac and Linux. PC users can use Videora to accomplish the same task. Some still/video hybrid cameras can record directly to mpeg-4, which will allow you to bypass the compression step thereby saving lots of time.
Recording Audio
First set up your microphone. On a PC you can plug an external mic into the sound card and set the input source from within Audacity's preferences

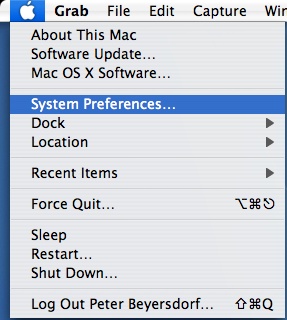
On a mac if you opt for an external mic, you will need to make sure that the mic outputs a "line level" output. Most mics do not, and therefore will need to be pluggeed into a premap or a digital capture device like the $40 griffin iMic. If you are using a wireless mic, the receiver unit probably has a line level output. Alternatively you can use an external USB mic. Once your mic is plugged in make sure to set your computer to use the correct input source. On a mac, go to the "Sound" preference pane
and select the appropriate sound input (i.e. "line-in" for an external mic plugged into the line-in jack on the computer)
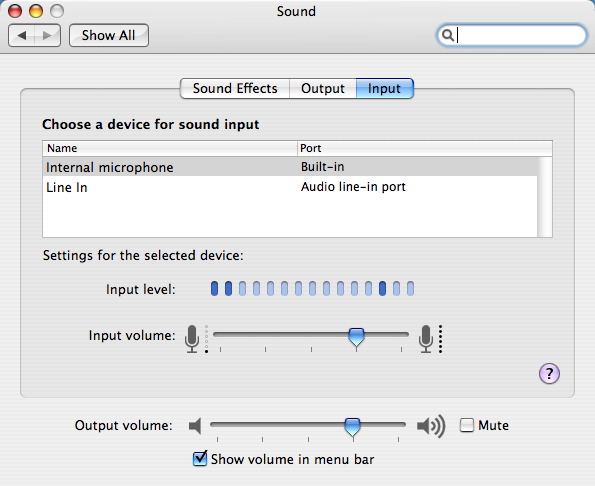
Adjust the input volume slider until the input level meter responds to your voice somewhere between 50% and 100% of the scale.
In the Audacity preferences select your recording input device from the AudioI/O tab. Then you are all set to start recording. Just hit the big red "record" button in the main window to start and the yellow "stop" button to stop.
From the file menu select "Export as mp3…"
You can check out one of the many online video tutorials or Steve Sloan's excellent audacity tutorial showing the detailed steps. It is suggested you set the"default sample rate" to 64k in the quality tab of the preference panel for a good compromise between sound quality and file size
Recording Enhanced Audio
Audio files can be marked up with still images and URLs that can be accessed by clicking on the images. These files are known as "enhanced audio" files. Perhaps the most powerful tool for lecturers who wish to record a powerpoint (or keynote) presentation as an enhaced audio file is the $30 application Profcast (mac only at this time). Drag your Powerpoint of Keynote file onto the profcast window and click the red record button.
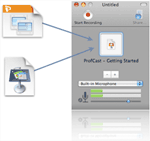
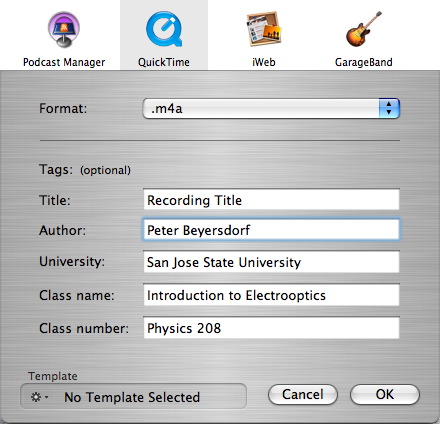
It will launch your presnetation for you. During the presentation it will record the audio from your internal microphone (or whatever external sound source you have configured) and create chapters every time you advance to a new slide. It grabs the slide image as the chapter artwork and takes the text in the title field as the chapter title. When you exit your presentation click "done" in the pop-up dialog and export to a quicktime file in m4a format
The file will be saved to your hard drive for later uploading into iTunes U.
Recording Video
When you record video for a podcast you have three options to acquire your footage. You can shoot with a miniDV camera (i.e. a video camera), you can shoot with a hybrid camera (i.e. the movie mode of most digital still cameras) or you can do a screen capture from your computer.
The final compressed video file will be much higher quality if you can keep the motion to a minimum (as only changes in the image need to be encoded), thus use a tripod and avoid unnecessary movements.
You can import and compress your content using Quicktime Pro. Apple has a nice online tutorial for mac and windows users. For a miniDV camera plug in the camera, open Quicktime and select "New Movie Recording" from the file menu. Click the red "record" button on the preview window and play the video on the camcorder until you have captured your full clip. If you are using a hybrid camera or screen capture software you can just open the video file in Quicktime. Once the video is in Quicktime, select "Export…" from the file menu and set the Export format pop-up menu to "Movie to iPod".
If you are using Handbrake or Videora export it in h.264 format with a resolution of 640x480 to produce an appropriate video file.
Compression will take about 2-4 times longer than the actual video footage, so a one hour video could take 5 hours to compress! If you expect to be encoding a lot of video, consider an mpeg-4 camera that records directly in the format necessary for iTunes U.
If your video file needs to be edited before it is published you can use iMovie on the mac for the capture, editing and exporting (it is preinstalled on all macs). Check out Apples on-line tutorial. On a PC you can use windows movie maker, as explained in this tutorial.
Most of the media formats handled in iTunes allow you to enhance the recording with metadata for greater accessibility. To insert a text transcript into an audio or video file:
- Copy the text transcript to your clipboard
- Open the iTunes application.
- Locate the audio file in the iTunes library. If it isn't already in your library, drag the recording file onto the iTunes window to import it.
- Select the audio file by clicking it with your mouse.
Open the Information dialogue, either through the File menu (File\Get Info), by pressing Ctrl+I, or right-clicking the file and selecting "Get Info" from the available options.
- Once the Information dialogue is open, select the "Lyrics" tab.
- Click inside the text window paste the text transcript into the window.
- Click "OK" at the bottom of the Information dialogue.
- Drag the recording out of iTunes to the desired location on your hard drive. The exported copy will contain the added metadata.
You can follow the same procedure to add text to the other metadata fields (artist, genre, etc), but the lyrics field is special in that it can accommodate up to 64 KB of text (about 25 pages) while the other fields can only hold 255 Bytes (about four lines of text).
If you wish to add captions to a video file that will be synchronized to the video, see this tutorial on captioning for quicktime.
An alternative method of including a text transcript for a recording in iTunes U is to save the transcript as a PDF file and upload it separately from the audio or video recording.
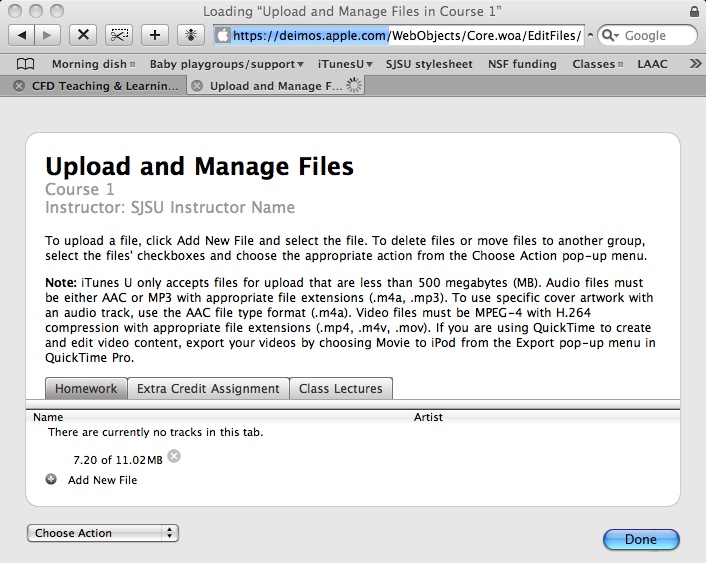
Uploading content
To upload your recordings or PDF files onto your iTunes U page, first login to iTunes U and navigate to your course page as described in the page setup section. Click on  on the right side of the page. Your browser will open up to an upload dialog on the right side of the page. Your browser will open up to an upload dialog
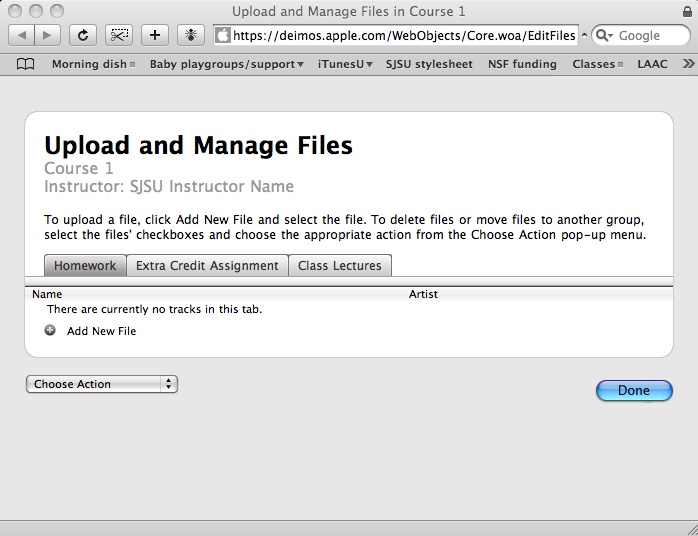 Select the tab in which you wish your uploaded content to appear, then click
  , A "choose file" button will appear that you can click to open a file browser.
Once you select the file on your computer to be uploaded, the upload status (i.e. , A "choose file" button will appear that you can click to open a file browser.
Once you select the file on your computer to be uploaded, the upload status (i.e.  ) will be displayed in the web page.
Once you select "done" your changes will be updated in the iTunes U page. ) will be displayed in the web page.
Once you select "done" your changes will be updated in the iTunes U page.
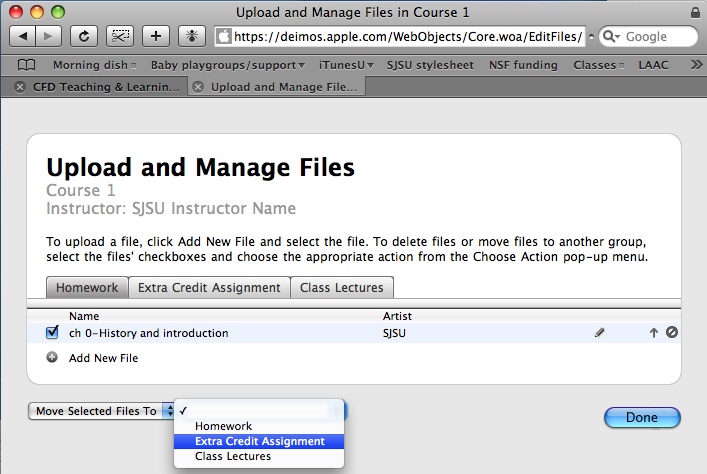
Managing files
In addition to uploading files into a particular tab, you can move, reorder, rename and delete files using the same "upload and manage files" tool. To edit a file's name or the "artist name" associated with a file select the edit icon next to the file name in the "upload and manage files" web page. The file name and artist field turn into editable textboxes.
 Upon completing your edits click
  to accept the changes. to accept the changes.
To move a file up or down in the list of files click  . To replace a file with a newer version of the same file, click . To replace a file with a newer version of the same file, click  and then follow the same procedure as for uploading a new file. To delete a file click and then follow the same procedure as for uploading a new file. To delete a file click  or select the file or files to delete using the selection box and select "Delete Files" from the "Choose Action" pop-up menu. or select the file or files to delete using the selection box and select "Delete Files" from the "Choose Action" pop-up menu.
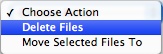
To move a file or files between tabs, select the files using the selection boxes, then select "Move Selected Files Tp" from the "Choose Action" pop-up menu.
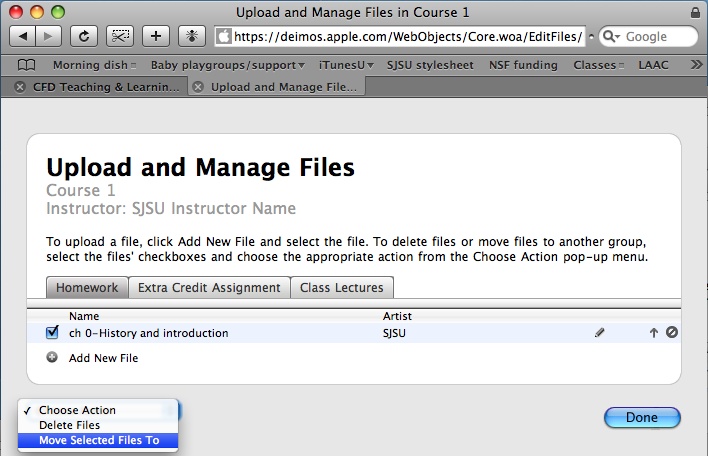
A new popup menu will appear to allow you to choose the tab to move the files into.
Once you select "done" your changes will be updated in the iTunes U page.
Finally remember to logout when you are finished by clicking  on the right side of the iTunes U page. on the right side of the iTunes U page.
|